
Equipment failure shuts down your kitchen during busy peak hours. Cold oil ruins orders, creates immediate financial losses, and increases customer complaints while service stops completely.
To diagnose commercial electric fryer failures, test high-limit switches, main thermostats, and temperature probes. Measure circuit continuity with a multimeter, clear carbonized oil buildup from sensor bulbs, and inspect wiring harnesses for heat damage.
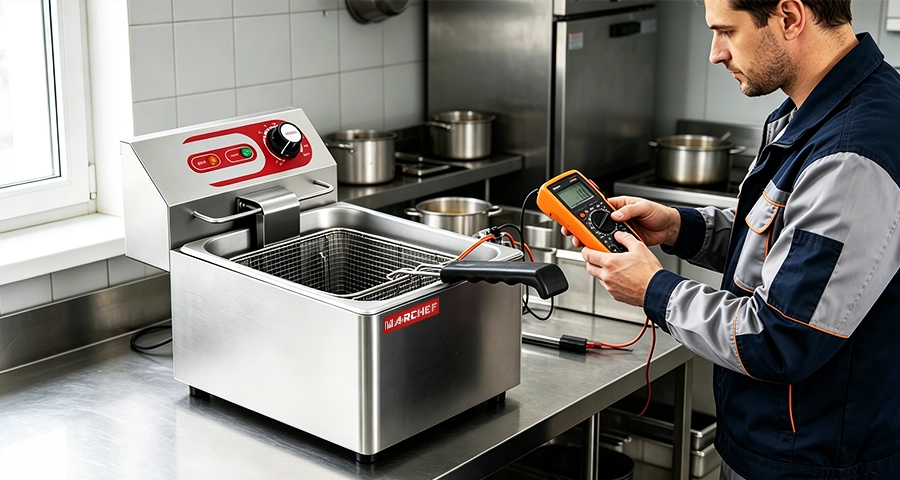
Diagnosing electrical issues quickly saves money and prevents unnecessary parts replacements. Let us look at how you can solve these common heating failures step by step.
Why Do Commercial Electric Fryers Stop Heating or Overheat?
Kitchen staff panic when oil temperatures drop during busy dinner shifts. Cold oil wastes expensive food ingredients and frustrates hungry customers who expect fast service.
Commercial electric fryers stop heating or overheat because carbonized oil insulates sensors, safety switches trip, or contactors weld shut. Extreme heat and grease buildup degrade internal wiring and disrupt accurate temperature control.
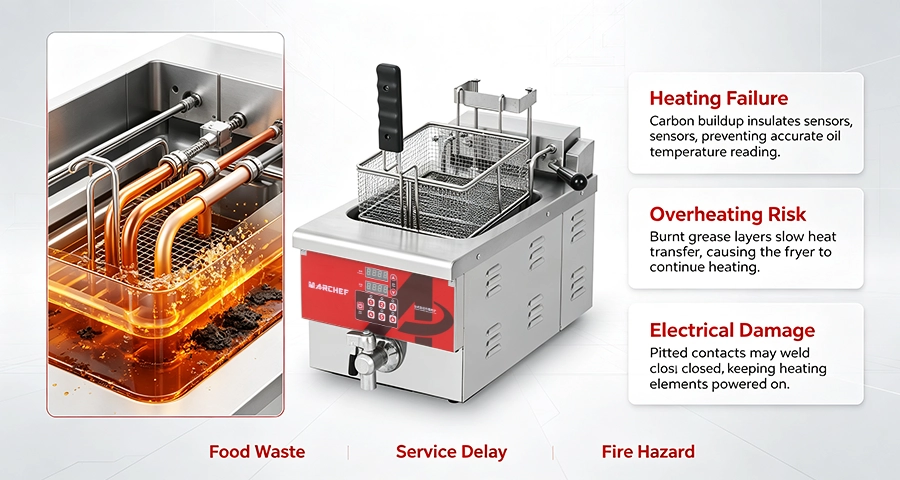
Commercial kitchens create a harsh environment for electrical parts. Deep fryers run at high temperatures for long hours every single day. Splattering oil coats heating elements and capillary tubes. This oil bakes into hard carbonized buildup over time. This layer acts like thermal insulation over temperature sensors. Heat cannot pass through the thick carbon layer efficiently. The sensor reacts too slowly to real oil temperatures. As a result, the fryer continues heating past its set point and overheats the oil. In addition, electrical contactor points can pit and weld together. Pitted contactors weld shut in a closed position. This fault delivers continuous power to heating elements even when control circuits open correctly.
| Impact Area | Kitchen Operator Problem | Equipment Dealer Problem |
|---|---|---|
| Component Failure | Immediate line shutdown and wasted food | High warranty repair costs and service calls |
| Overheating Incidents | Fast oil breakdown and fire hazards | Damage to brand reputation and client trust |
| Frequent Downtime | Lost daily sales and unhappy customers | High inventory costs for emergency spare parts |
How Do You Diagnose Component #1: The Electric Fryer Thermostat?
Unstable oil temperatures ruin fried food quality during peak hours. Soggy or burnt food frustrates kitchen staff and hurts your business reputation quickly.
An electric fryer thermostat fails when target temperatures fluctuate, heating becomes uneven, or runaway heating occurs. You diagnose it by cleaning carbonized oil off capillary bulbs and checking contacts for electrical damage.
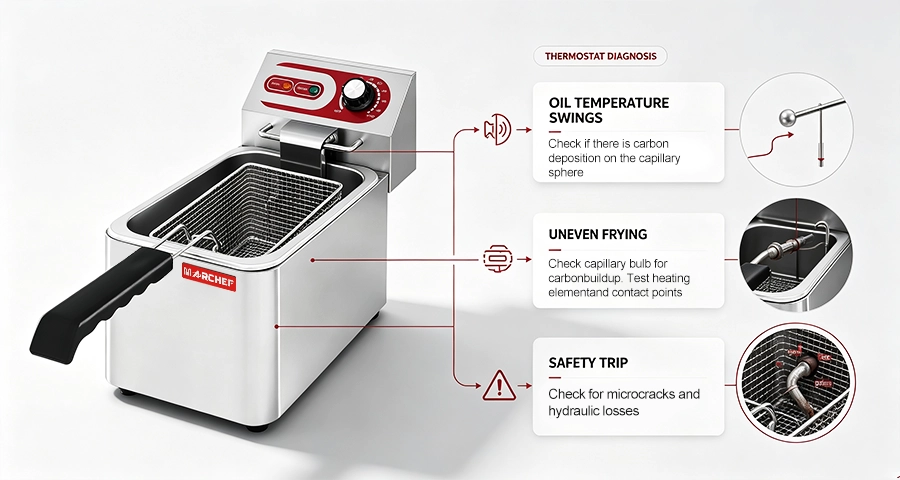
The main thermostat regulates daily cooking oil temperature. When it fails, you see clear signs of trouble. The oil may never reach your target cooking temperature. Sometimes the oil heats continuously until safety switches trip. Uneven frying is another common warning sign. Carbonized oil buildup on the thermostat capillary bulb acts as thermal insulation. This buildup causes delayed temperature sensing. The thermostat thinks the oil is cold, so it keeps the heating elements powered on. This leads directly to runaway oil overheating. However, staff must clean sensor tubes carefully. Aggressive scrubbing creates micro-fractures in capillary tubing. These micro-fractures cause a loss of internal hydraulic pressure that permanently disables the thermostat. Also, welded contactor points can mimic thermostat failure by continuously sending power to elements.
| Thermostat Failure Mode | Observed Physical Cause | Corrective Diagnostic Action |
|---|---|---|
| Runaway Overheating | Thick carbon layer insulating capillary bulb | Clean bulb gently; test contactor function |
| No Heat / Low Heat | Loss of hydraulic pressure from micro-fractures | Inspect capillary line for cracks; replace thermostat |
| Temperature Drift | Internal calibration loss or contact pitting | Measure actual oil temperature; replace switch |
How Do You Troubleshoot Component #2: The High-Limit Switch?
Active power lights trick staff into thinking heating elements are broken. You risk replacing expensive heating elements when a small safety switch simply tripped.
A tripped high-limit switch causes active indicator lights while power fails to reach heating elements. You troubleshoot it by resetting the manual button and testing terminal continuity using a digital multimeter.
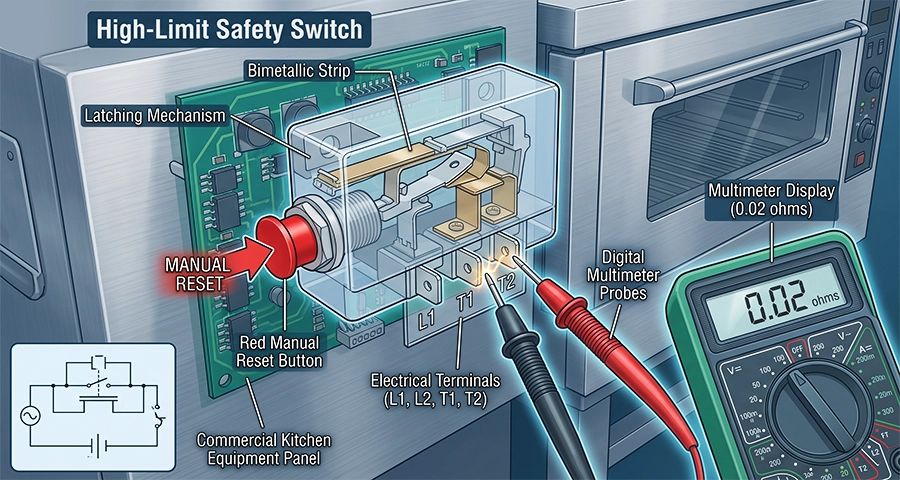
The high-limit switch acts as an essential safety cutoff device. It cuts electrical power instantly when oil reaches dangerous safety thresholds. When this switch trips, power cannot reach the main elements, but indicator lights remain lit. Frequent overheating trips wear out internal switch contacts over time. False trips also happen when carbonized grease traps excessive heat around the sensor bulb. Sometimes the mechanical manual reset button breaks internally. The switch stays stuck in an open circuit position. To troubleshoot, turn off main power and let the oil cool down completely. Press the red manual reset button firmly until you hear a click. Next, test switch terminals using a digital multimeter set to Ohms. An infinite resistance reading confirms an open electrical circuit, which means you must replace the switch immediately.
| Multimeter Continuity Result | Switch Condition Status | Required Technician Action |
|---|---|---|
| 0 Ohms (Continuity) | High-limit switch is closed and working | Inspect main contactors and heating elements |
| Infinite Ohms (Open) | Switch is tripped or mechanically broken | Press manual reset button; retest continuity |
| Persistent Open Circuit | Internal contacts or bulb damaged | Replace switch with certified spare part |
How Do You Fix Component #3: Temperature Probes & Thermocouples/RTDs?
Digital control panels showing erratic error codes cause unexpected shutdowns. Kitchen staff cannot tell if oil temperatures are safe for cooking.
Fix temperature probe failures by inspecting wire insulation for hot oil damage and measuring sensor resistance in Ohms against manufacturer specification tables. Wire fatigue from daily cleaning causes most probe errors.
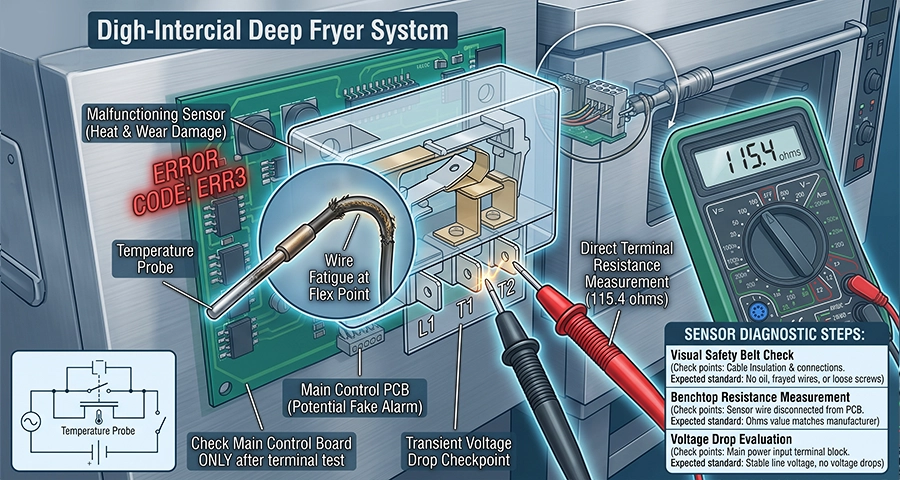
Modern commercial fryers rely on electronic digital controllers with RTD sensors or thermocouples. When these electronic components fail, digital screens display jumpy numbers. The board might show error codes or trigger false high-temperature alarms. Thermocouple and RTD probe failures frequently originate from wire fatigue and insulation degradation. Kitchen staff tilt heating elements up and down during daily cleaning. This repeated bending causes wire fatigue inside the protective sheath. Hot oil exposure also breaks down cable insulation over time. In addition, transient voltage drops across worn main terminal blocks can trigger false digital sensor error codes even when probe resistance tests within normal specifications. Always measure probe resistance directly at terminal connections to confirm sensor health before replacing the main control board.
| Sensor Diagnostic Step | Inspection Point | Expected Technical Standard |
|---|---|---|
| Visual Harness Check | Cable insulation and terminal connections | No oil soaking, frayed wires, or loose screws |
| Bench Resistance Measurement | Sensor wires disconnected from board | Resistance value matches manufacturer Ohm chart |
| Voltage Drop Assessment | Main incoming power terminal block | Stable line voltage without voltage drops |
How Can You Extend Component Lifespan by 50%?
Unexpected equipment breakdowns destroy daily kitchen profits and cause severe operational stress. Emergency service calls drain business budgets over time.
You can extend commercial fryer component lifespan by 50% through daily sensor cleaning, regular oil filtration, and bundling OEM replacement parts like capillary guards during routine repairs.
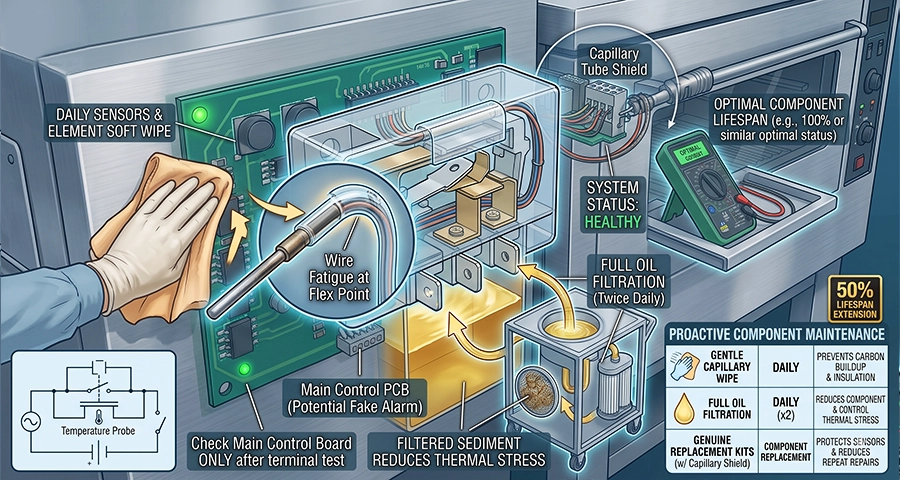
Simple daily preventive maintenance prevents most electrical component failures. You should wipe capillary tubes gently every night using warm water and mild grease solvents. Never use steel wool or harsh scrapers because rough tools create micro-cracks in delicate sensor tubes. Filter cooking oil at least twice daily in high-volume kitchens. Clean oil transfers heat evenly across heating elements. Dirty oil contains heavy food particles that settle on heating elements. This burnt sludge forces elements to run hotter than necessary, which increases thermal stress on internal electrical parts. Equipment distributors should also stock pre-bundled safety components. Pre-bundling high-limit switches and capillary guards with replacement heating element kits protects sensors and significantly reduces repeat service claims.
| Maintenance Task | Recommended Frequency | Component Protection Benefit |
|---|---|---|
| Capillary Tube Soft Wipe | Daily after kitchen shutdown | Prevents carbon buildup and thermal insulation |
| Complete Oil Filtration | Twice daily during operations | Reduces heat stress on elements and controls |
| Safety Component Refresh | During element replacement | Protects high-limits and prevents repeat failure |
Conclusion
Commercial fryer troubleshooting requires checking thermostats, high-limit switches, and temperature probes. Daily cleaning and regular maintenance prevent costly equipment downtime and extend component lifespan.